
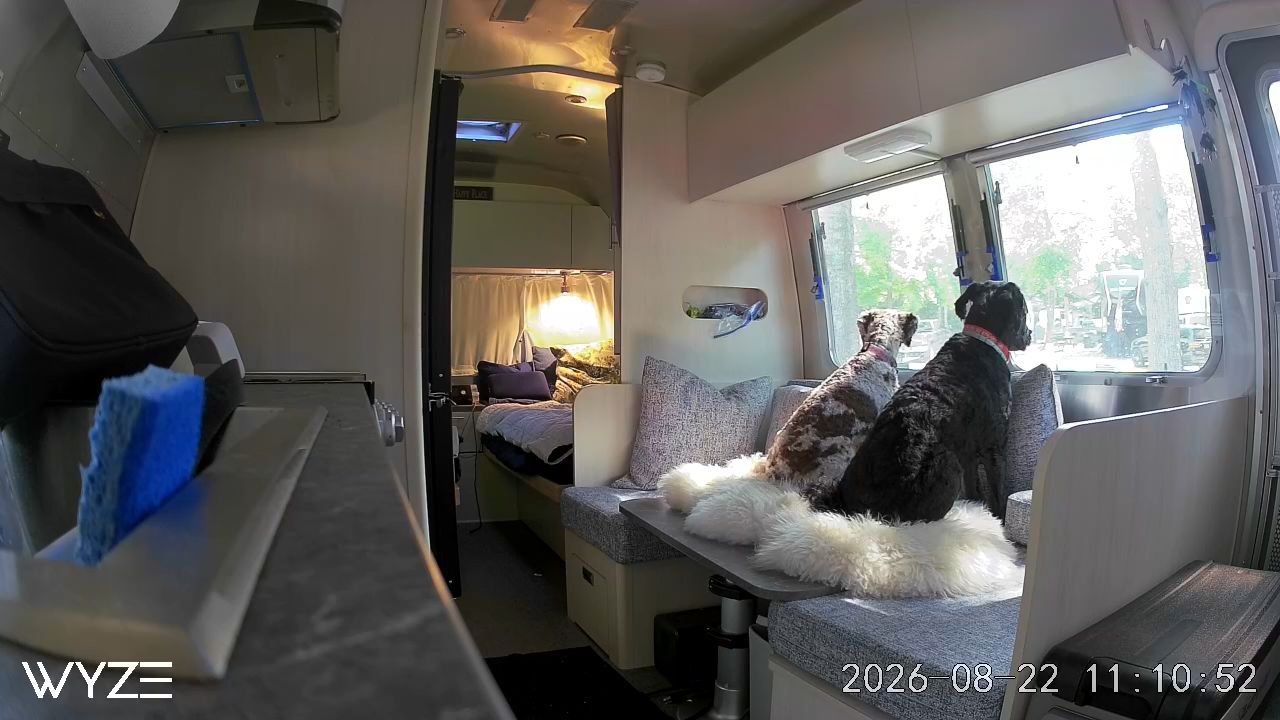

Photos of the latches and lever cutouts belong on this page once we attach them. The copy is the live draft.
Eleanor here.
The screens in this rig were never designed to be a load-bearing wall. They were designed to keep bugs out while we cracked a window. Chester did not get that memo. Dublin did not get it either. He just leans like a gentleman and the mesh still loses.
I got tired of finding a nose-shaped sag in the screen after a squirrel briefing. So I put clear plexiglass over the interior side of the windows. The factory screens stay. The dogs still get the view. The mesh stops taking the hit.
A solid sheet over the whole opening would have trapped the window levers and killed the airflow. That is not a fix. That is a new problem. We used a soldering iron to cut out the spots where the levers swing, so the windows still crank out and air still comes in.
This is not a pretty factory option. It is a field fix. It works.
The actual problem
Interior RV screens sit right where a dog wants to stand watch. Sill height is chest height on an AussieDoodle. Paws go up. Shoulders go forward. If the glass is open, the only thing between sixty pounds of curiosity and the campsite is a rectangle of fiberglass mesh held in a thin frame.
That mesh will:
- Stretch into a belly
- Pop a corner out of the spline
- Tear if a claw finds the weave
- Let mosquitoes in the first night you do not notice
Wayne can reroute a highway. He cannot splice a screen at dusk with Chester supervising. I would rather not spend a travel day hunting a screen shop in a town that closed at 2.
So the job was simple. Protect the screen. Leave the factory levers usable. Keep enough opening that a cracked window still moves air. Do it without a permanent install I would regret in six months.
What I installed
Clear acrylic sheets, cut to the interior window opening, mounted on the cabin side of the screen.
Not glass. Glass is heavier, it shatters, and I do not want that near dog traffic. Acrylic (the stuff people call plexiglass) takes a scratch before it takes a fracture. If Chester wins a staring contest with a deer and leans in, the panel flexes. The screen behind it does not eat the force.
On our windows the panels sit against the aluminum interior frame. Black latches and clamps hold them. I can still pop a panel off for a real clean. Day to day, they stay on.
If you look at the hardware, it is not magic. It is positive hold so the sheet cannot walk when the rig moves. A panel that rattles on the highway will make you hate the modification by Tuesday.
The part most people skip is the lever. These windows do not help you if the plexi blocks the operator. That is why the cutouts exist.
The soldering iron cutouts
A saw will grab acrylic and crack a corner you cannot hide. A drill makes a hole. It does not give you a clean, shaped opening around a window lever.
We marked where each lever travels when the window opens. Then we used a soldering iron to melt those openings out of the sheet. Slow. Steady. Only the path the hardware needs, plus a little clearance so nothing binds when the metal gets hot in the sun.
What that gives you:
- The lever still swings
- The glass still opens
- Air still comes through the cutout and the screen
- The rest of the panel stays solid where the dogs lean
Do this outside or with real airflow. Melting acrylic smells like a mistake you will remember. Let the edge cool before you test the lever. The melted rim will be a little proud. That is fine. A sharp burr is not. Dress anything a paw or a wrist could catch.
I did not cut giant decorative holes. I cut what the hardware required. Extra opening is extra place for a nose to try its luck.
Why the screen stays
Some people rip the screens out and run solid interior panes. That solves the dog problem and creates a bug problem the first time you want night air.
I kept the screens because they still do their job:
- Bugs stay outside when the glass is cracked
- Dust drops before it reaches the cabin
- The factory look from outside does not change
- If a plexi sheet ever cracks, I still have a screen until I cut a replacement
The plexi is the sacrificial layer. The screen is the one I refuse to replace twice a season. The cutouts are how those two ideas live in the same window.
How the dogs use it now
Dublin treats the window like a porch. He parks in the shade of the frame and watches the tree line. The panel gives him a solid place to lean. He does not sag the mesh anymore. He also does not steam a hole in it with that slow Grand-Da sigh he does when Chester starts a meeting.
Chester still announces every bird. He still puts both paws on the sill. The difference is I do not hear the screen twang. He hits hard plastic, looks slightly offended, and continues the briefing.
That is the whole point. I did not train the behavior out of them. I removed the failure point. I also did not seal us in to do it.
What this is not
This is not insulation. Acrylic is not a winter pane and I do not sell it that way.
This is not a blackout shade. You will still get sun. In summer that means you still need your usual heat plan. Nothing here replaces fans, monitoring, or the rule that dogs do not wait in a closed rig.
This is not a reason to leave windows open and walk away. A rigid interior panel stops a paw. It does not stop a determined dog if the glass is wide open and the latch is cheap. Hardware quality matters. Check the clamps after a washboard road. Check the lever cutouts too. If the opening is tight, heat swell will make the operator stick.
This is also not invisible. You will see the sheet, the black hardware, and the melted openings from inside. I can live with that. I could not live with another blown screen in a state park that does not sell spline.
Cut and fit notes
Measure the interior opening, not the glass.
Leave a little clearance so the sheet does not bind when the metal expands in heat. A tight press fit feels satisfying on day one and chatters on day four.
Round the corners. Square corners find dog shoulders and human hips.
Mark the lever swing before you heat anything. Open the window. Watch the handle. Trace that path on the film. Then cut.
Peel film last on the main face. Leave film on while you melt the cutouts so you are not dragging a hot tip across a finished surface you already cleaned.
Use an acrylic-safe cleaner later. Glass cleaner with ammonia will haze the sheet. Then you have a window you cannot see through and a modification you want to rip out.
Airflow, heat, and honest tradeoffs
The cutouts are the airflow plan. The windows still lever out. Air still moves through the opening and the screen. You do not have to strip the cabin of panels every time you want a breeze.
It is not the same as a fully open screened window. It is enough for how we actually camp. Roof fans still do the heavy lifting on a hot afternoon. The dog-traffic windows stay protected. The levers still work.
Glare is real at certain sun angles. If a panel sits in a harsh reflection, I would rather have a slightly scratched sheet than a blind spot while I am moving around the cabin.
Weight is not an issue at this size. Noise is, if the hold-downs are lazy. Tighten after the first hundred miles. Cycle each lever after that same stretch and make sure the melted opening did not shift.
What I would do again
I would still use clear acrylic, not tinted. The dogs use these windows as watch posts. Tinted sheets turn the woods into mud and they press harder trying to see.
I would still use removable hardware. Permanent adhesive on an Airstream interior is a decision you get to explain to yourself later.
I would still cut the lever openings with heat instead of forcing a saw through a finished panel on the wall.
I would still start with the windows they actually lean on. You do not need to armor every pane on day one. Do the high-traffic sides. Live with it a week. Then cut the rest.
The checklist if you copy this
- Identify the windows the dogs actually use as lookouts.
- Measure the interior frame opening. Write the numbers down. Measure twice.
- Buy acrylic thick enough that it does not oil-can when a dog leans. Thin sheets vibrate and look cheap.
- Cut the sheet, round corners, leave an expansion gap.
- Mark the lever travel with the window open. Give it clearance for heat swell.
- Melt those openings with a soldering iron, outside or with real ventilation. Let the edges cool. Knock down any burr a paw could catch.
- Mount with clamps or latches you can release without a toolkit.
- Cycle every lever. Confirm the glass still opens and air still moves.
- Road-test. Listen for rattle. Retighten. Cycle the levers again.
- Keep one spare sheet or at least the offcut. Put acrylic cleaner in the same bin as the window cloths so nobody grabs Windex on instinct.
The part that matters
This modification is boring in the best way. Nobody writes poetry about a clear sheet with two melted holes for a window lever. Chester will not add it to his org chart. Dublin will nap against it and call that a successful afternoon.
I installed it so the screens survive the season, the bugs stay outside, the windows still open, and I am not on my knees with a spline roller before dinner.
If you travel with dogs who believe every window is a duty station, protect the mesh. Leave the levers a path. Let them watch. Make the plastic take the lean.
Wayne can keep the routes. I will keep the cabin from turning into a screened porch with holes.
When you copy this, measure twice, mark the lever swing, and peel the film last. Then go outside and let the dogs do their job from a window that can take it.